


Bucket teeth wear is normal, but ignoring it gets expensive fast. Watch for seven signs: rounded tips, shorter teeth, slower digging, higher fuel use, loose or worn adapters, cracks and chips, and thinning metal on the bucket lip. Catch them early, and you can replace a few teeth. Wait too long, and you pay for adapters, or even a whole bucket.
Teeth are the first part of your excavator buckets to hit the ground, so they wear out first. That's their job. The trick is knowing when "worn" turns into "costly."
Below, you'll see what each warning sign looks like, how to check your teeth in about five minutes, what makes them wear faster, and when to replace, repair, or start fresh with a new bucket.
If you spot even one of these, inspect the whole row of teeth. Here's the short version.
|
# |
Sign |
What you'll see or feel |
Why it matters |
|
1 |
Rounded or blunt tips |
Tips look like thumbs, not chisels |
The bucket pushes the ground instead of cutting it |
|
2 |
Shorter teeth |
A tooth is clearly shorter than a new one |
Less metal is left to protect the adapter |
|
3 |
Slower digging |
Extra passes to fill the bucket |
You lose time on every cycle |
|
4 |
Higher fuel use |
The engine works harder on the same job |
Fuel costs and machine strain climb |
|
5 |
Loose teeth or worn adapters |
Wobbly teeth, uneven pins, bare adapter nose |
Adapters cost more than teeth |
|
6 |
Cracks, chips, uneven wear |
Broken tips, cracks near the pin hole, one tooth far shorter |
A tooth can break mid-dig |
|
7 |
Lip and sidebar wear |
Thin, shiny, or rolled metal between the teeth |
The bucket itself starts wearing out |
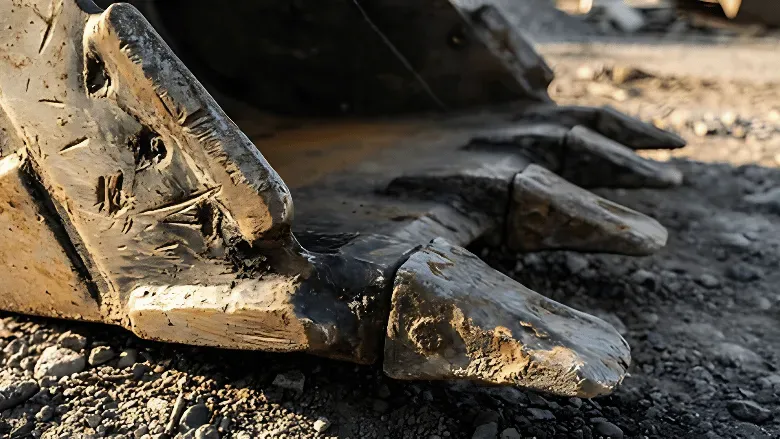
A worn tip looks like a thumb. A good one looks like a chisel. That change matters because a blunt tip pushes the ground instead of cutting it.
A sharp tip puts all your digging force on a small spot. As the tip wears, that force spreads out, and the machine needs more power for the same bite. You'll often feel it before you see it. The bucket seems to skate over hard ground or bounce off compacted soil.
How to check: Stand to the side and look at the tooth profile. Then hold it up against a new tooth. If the point has gone round, the tooth is losing its edge.
Common mistake: Waiting until the tip is gone. Caterpillar's Bob Klobnak told Equipment World that crews often swap teeth while metal is still left, because the operator can feel the bite getting worse. Trust that feel. A tooth can be unbroken and still be done.
Plan to replace teeth well before they wear flat. One supplier's field guide puts the standard trigger at roughly 50 to 60 percent of the original length. Treat that as a rule of thumb. Your tooth maker's wear guide always comes first.
Why so early? Less tooth means less steel between the dirt and your adapter. Once the tooth gets thin, the adapter starts taking hits. Volvo and Doosan manuals both say the same thing: replace teeth before the adapter wears away or shows through.
Measure, don't guess. You look at the same bucket every day, and your eyes get used to the wear. Set a new tooth beside a worn one, measure both with a tape, and write the numbers down.
Tip: On install day, snap a photo of the new teeth next to a tape measure. Add the date and the machine hours. A few weeks later, you'll know your real wear rate.
Watch the whole row. If one tooth is much shorter than its neighbors, the longer ones carry the load. The adapters under the short ones take extra punishment. That's why many suppliers advise replacing teeth as a set.
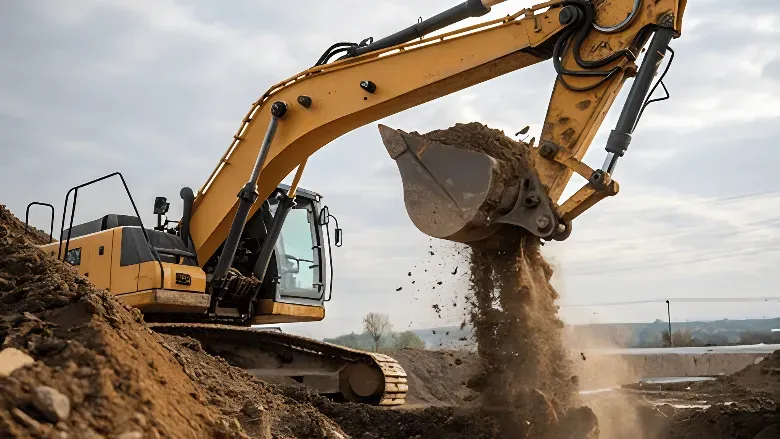
If your bucket needs extra passes to fill, check the teeth first. Blunt teeth cut less ground per pass, so every cycle takes longer and moves less.
Picture a trench job. Early in the week, you fill the bucket in one clean pass. By Friday, you're crowding twice, curling hard, and still coming up short. Say nothing else changed on the machine. The teeth did.
Bobcat's ground-engaging tools specialist makes the same point: if a machine loads buckets more slowly or needs extra effort to penetrate, worn tools may be the cause.
Be fair to the teeth, though. Slow digging can also come from low hydraulic pressure, sticky clay packing the bucket, or the wrong tooth type for the ground. Check the teeth first because it takes five minutes and costs nothing.
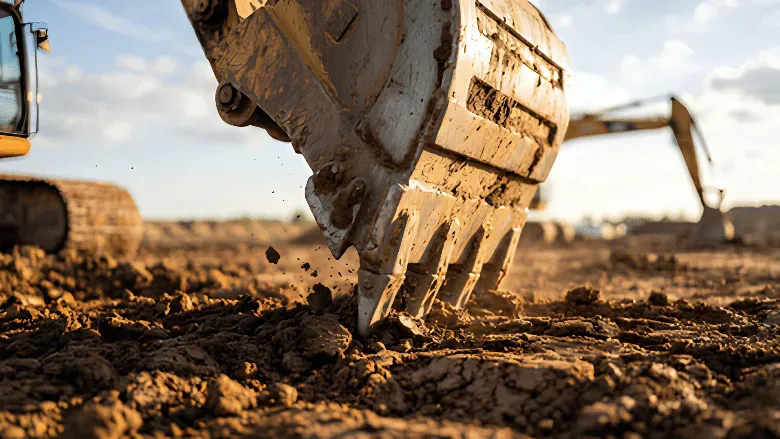
Worn teeth make your excavator work harder for the same dirt, and harder work burns more fuel. Think of cutting bread with a butter knife. You can do it, but it takes more effort and makes a mess.
When tips go dull, the operator pushes harder, raises engine speed, and leans on the hydraulics. Pressure and heat go up, and so does fuel per hour. Equipment World says it plainly: a blunt tooth makes you burn more fuel and costs you buckets over a day. And Caterpillar's Klobnak links the two directly. Less force to push into the pile means less fuel.
How to spot it: Track fuel per hour on similar jobs. If the number climbs and nothing else changed (same material, same operator, same machine), look at your teeth. Listen, too. An engine that bogs down at the start of each dig is a clue.
A fair warning: No single percentage fits every site. Soil, machine size, and operator habits all change the answer. Compare against your own baseline, not someone else's number.
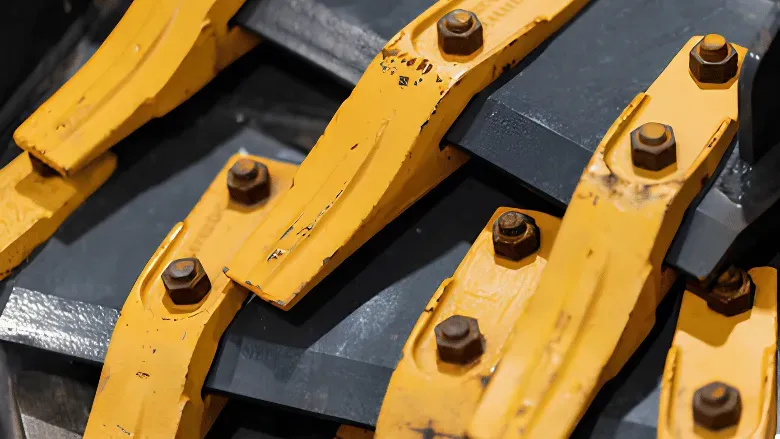
A wobbly tooth means the pin, the tooth, or the adapter is worn, and it's time to stop and look. The adapter is the part welded or bolted to the bucket lip. The tooth slides onto it, and a pin locks it in place.
What to look for:
Why it matters: Adapters cost more than teeth. Equipment World reports that replacing an adapter can run about ten times the price of replacing a tooth. Prices vary by machine and brand, but the gap is big. A lost tooth is an emergency for the same reason. Keep digging, and the bare adapter nose takes every hit.
Don't: Keep hammering a loose pin back in. If a tooth won't stay tight, the fit is worn, and a new pin won't fix it.
Also avoid backdragging a loader bucket or chopping at asphalt with an excavator bucket. Equipment World lists both as ways to damage adapters.
Cracks and chips mean a tooth could break mid-dig, so replace it right away. Uneven wear across the row is a clue that something is off with the tooth type, the ground, or how the bucket gets used.
What to look for: hairline cracks near the pin hole or at the base, chipped tips, one side of a tooth worn flat, or one tooth far shorter than the rest.
What it can mean (not always):
|
What you see |
A likely cause |
|
Chips and cracks |
Hard impacts, like rock or frozen ground |
|
One tooth wearing much faster |
A profile that doesn't suit the ground, or a tooth swapped late |
|
One-sided wear |
How the bucket is curled or angled during the dig |
A broken tooth can also hurt other equipment. Equipment World points out that a lost tooth falling into a crusher can damage the crusher's motor or other major parts.
Common mistake: Switching to a harder tooth to stop fast wear. Hard steel resists abrasion but can crack on a sharp hit. Soft steel takes shocks but wears faster. Most makers strike a balance, so ask your supplier which fits your ground.
When the metal behind the teeth starts thinning, the bucket itself is wearing, and new teeth alone won't fix that. The lip (also called the cutting edge) and the sidebars sit right behind and beside the teeth. They do their share of the dirty work.
Teeth shield the lip. Once teeth get too worn, or go missing, abrasion hits the lip directly. So look between the teeth. Shiny, thin, rolled, or scalloped metal is a warning. Check the corners and sidebars too. One supplier puts it bluntly: new teeth on a bucket with a worn-through edge are only a short-term fix.
Some buckets use bolt-on cutting edges. Those can be rotated or replaced once wear reaches the lip plate, so check which kind you have.
If you keep wearing through lips in sand, gravel, or other abrasive ground, put a heavy-duty bucket next to a standard one when you compare options.
Give the bucket a quick walk-around at the start of every shift, and do a measured check once a week. Always park first.
|
Check |
How often |
What you need |
|
Walk-around for missing teeth and cracks |
Every shift |
Your eyes |
|
Tip shape and length against a new tooth |
Weekly |
Tape measure, new tooth |
|
Pin and adapter fit |
Weekly |
Gloved hand |
|
Lip and sidebar thickness |
Monthly |
Tape or caliper |
These intervals are our suggestion, not a code. Abrasive or rocky work may call for more frequent checks. And one more habit from Equipment World's sources: use weekends and days off to check that components still fit tight.
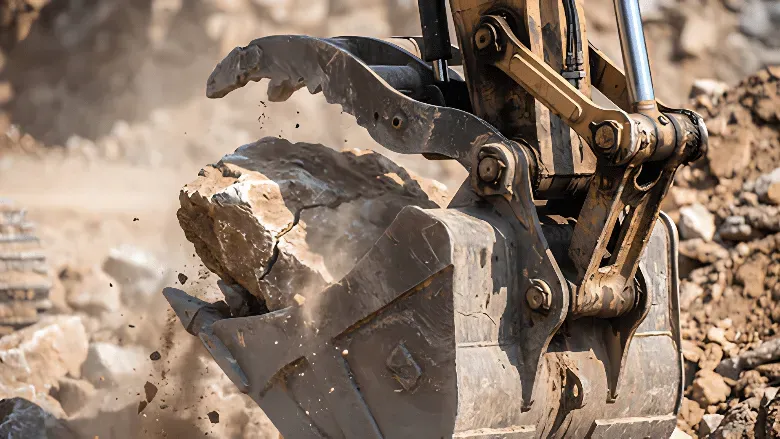
Abrasive ground, hard impacts, the wrong tooth type, and rough habits wear teeth fastest. You can't stop wear, but you can control most of these.
|
Factor |
What happens |
What helps |
|
Sand, gravel, abrasive soil |
Steady grinding of tips and lip |
Replace on a schedule and watch the lip |
|
Rock and blasted material |
Chips, cracks, impact damage |
Use a bucket and teeth meant for rock, and don't pry |
|
Compacted or frozen ground |
Blunt tips stall the bite |
Penetration or tiger-style teeth |
|
Wrong tooth profile |
Fast wear or a poor bite |
Match the profile to the material |
|
Reloading a partly filled bucket |
Teeth wear twice for a bit more material |
Fill the bucket right the first time |
|
Running to failure |
Adapters wear and cost more |
Replace before the adapter shows |
There's a trade-off here, and ESCO's Kirk Yoresen described it to Equipment World. A tooth that wears for a long time may push through the ground harder. A tooth that penetrates easily may wear faster. Mines and quarries often favor wear life. A contractor on tight digging may favor penetration. Your ground and your machine decide.
One warning from the same article: don't hardface finished teeth yourself. The makers say the welding heat can ruin the steel's temper, void the warranty, and make the tooth break.
If rock is your daily ground, compare a rock bucket with a general-purpose bucket before you buy.
Replace the teeth when only the teeth are worn. Repair or replace the adapters and lip when wear has reached them. Buy a new bucket when wear shows up everywhere.
|
What you find |
Best move |
Why |
|
Dull or short teeth, adapters still tight |
Replace the teeth, ideally the full set |
It's the cheapest fix and restores even penetration |
|
Adapter nose worn or a sloppy fit |
Replace the adapters along with the teeth |
A worn adapter loosens even new teeth |
|
Lip thin between the teeth |
Rebuild or replace the cutting edge |
The edge protects the bucket body |
|
Cracks in the bucket body or lip |
Have a qualified welder repair it, or replace the bucket |
Safety and strength |
|
Wear on the lip, sidebars, and adapters at once |
Compare repair cost with a new bucket |
Repairs add up fast |
Here's a simple test. Add up the repair parts, the shop time, and the days the machine sits idle. If that total gets close to the price of a new bucket, buy the bucket. Weld-on adapters need welding, so plan for shop time either way.
When a new bucket is the answer, a standard excavator bucket suits general digging. Choose a tougher style if your ground is rocky or abrasive.
Match the tooth to the ground, replace on time, and keep operators from abusing the bucket. Those three habits do most of the work.
If your bucket is past saving, or you're tired of replacing teeth every few weeks, tell us what you dig. Send your machine model, the material you work in, and a photo of the worn bucket. The Pangu Machine team can talk through bucket options with you. Contact us to ask for a quote.
Bucket teeth wear is a clock you can read. Rounded tips, shorter teeth, slower cycles, higher fuel use, loose adapters, cracks, and thin lips are all your machine telling you it's time. Teeth are the cheap part. Adapters cost more, and the bucket costs more still. So replace early.
Here's what to do next:
Replace them when the tips are rounded, the teeth are clearly shorter than new ones, or you see cracks or a loose fit. Don't wait for a tooth to break or for the adapter to show. Measure against a new tooth, and follow your tooth maker's wear guide.
There's no single number. Ground type changes everything. One supplier's field guide gives these rough ranges per set:
|
Ground |
Estimated hours per set |
|
Soft soil and clay |
200 to 400 |
|
Mixed fill and compacted ground |
100 to 200 |
|
Hard rock, shale, abrasive material |
40 to 100 |
Treat these as estimates. Track your own hours, and you'll get a better answer than any chart.
Glance at them every shift and do a measured check once a week. Check the lip and sidebars about once a month. Do it more often in rock or abrasive ground.
Yes, if one is cracked or broken. But a mixed set wears unevenly, and the longest teeth carry the load. Many suppliers recommend replacing the full set.
You'll dig slower and burn more fuel. Then the adapters wear, and then the bucket lip. Each step costs more than the last.
Yes. Blunt teeth need more force to enter the ground, and more force means more fuel. Trade press and equipment makers agree on the direction. The size of the effect depends on your ground, machine, and operator, so measure your own fuel per hour.
The tooth is the replaceable tip that does the digging. The adapter is the part welded or bolted to the bucket lip that holds the tooth. A pin locks the two together. Teeth wear out first, and adapters cost more to fix.
Bucket teeth wear is normal, but ignoring it gets expensive fast. Watch for seven signs: rounded ...
READ FULL

Have a question or need a quote? Fill out this form and our team will get back to you quickly!
